Click the drawing to download.
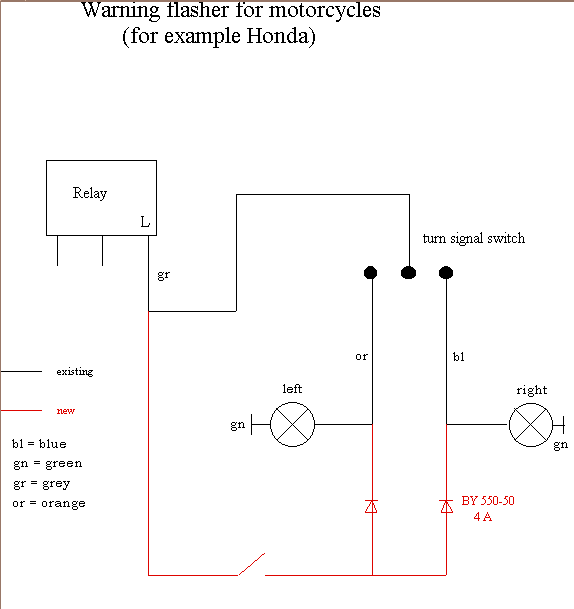
Before starting, you must make sure, that your TA is equipped with an electronic flasher relais. You recognize this by the presence of three connectors. When finding just two, you have a mechanical relais, and you have to replace it with an electronic one. The reason is, that mechanical relais are designed to work with a very specific resistance load. The electronic ones are tolerant to a much broader resistance load. At least German models are equipped with elctronic relais by factory. You'll find the relais on the right side of the dashboard behind the lining. If you're not sure, turn on the flasher and listen to the clicking.
The diodes should stand at least 3.5 Ampere (2*21 Watt / 12 Volt), so the 4 Ampere BY550-50 are a good choice. Wired like this, the warning flasher will only work, if the ignition is on; so a possible modification would be to plan another switch to change between ignition on and ignition off operation. There will be no extra operational display necessary, since the Transalp has an extra display for both left- and right-turn indicator. When switching on the warning flasher, both displays will flash.
This circuitry should work with any Honda bike; for any other bike have a look to the wiring diagram of the bike to figure out if the turn signals are wired in a similar way and which color is the lead of between the relay and the turn signal switch.
Click the drawing to download.